Installing a TLS certificate on Plesk
Plesk is a popular administration panel for server administration which offers countless advanced functions. With its help, you can manage the server without administrator knowledge. One of the most common tasks is to insert a TLS certificate for a domain hosted on a server with Plesk, and is covered in this guide. It was created on Plesk Obsidian in version 18.0.36.
Certificate management in Plesk
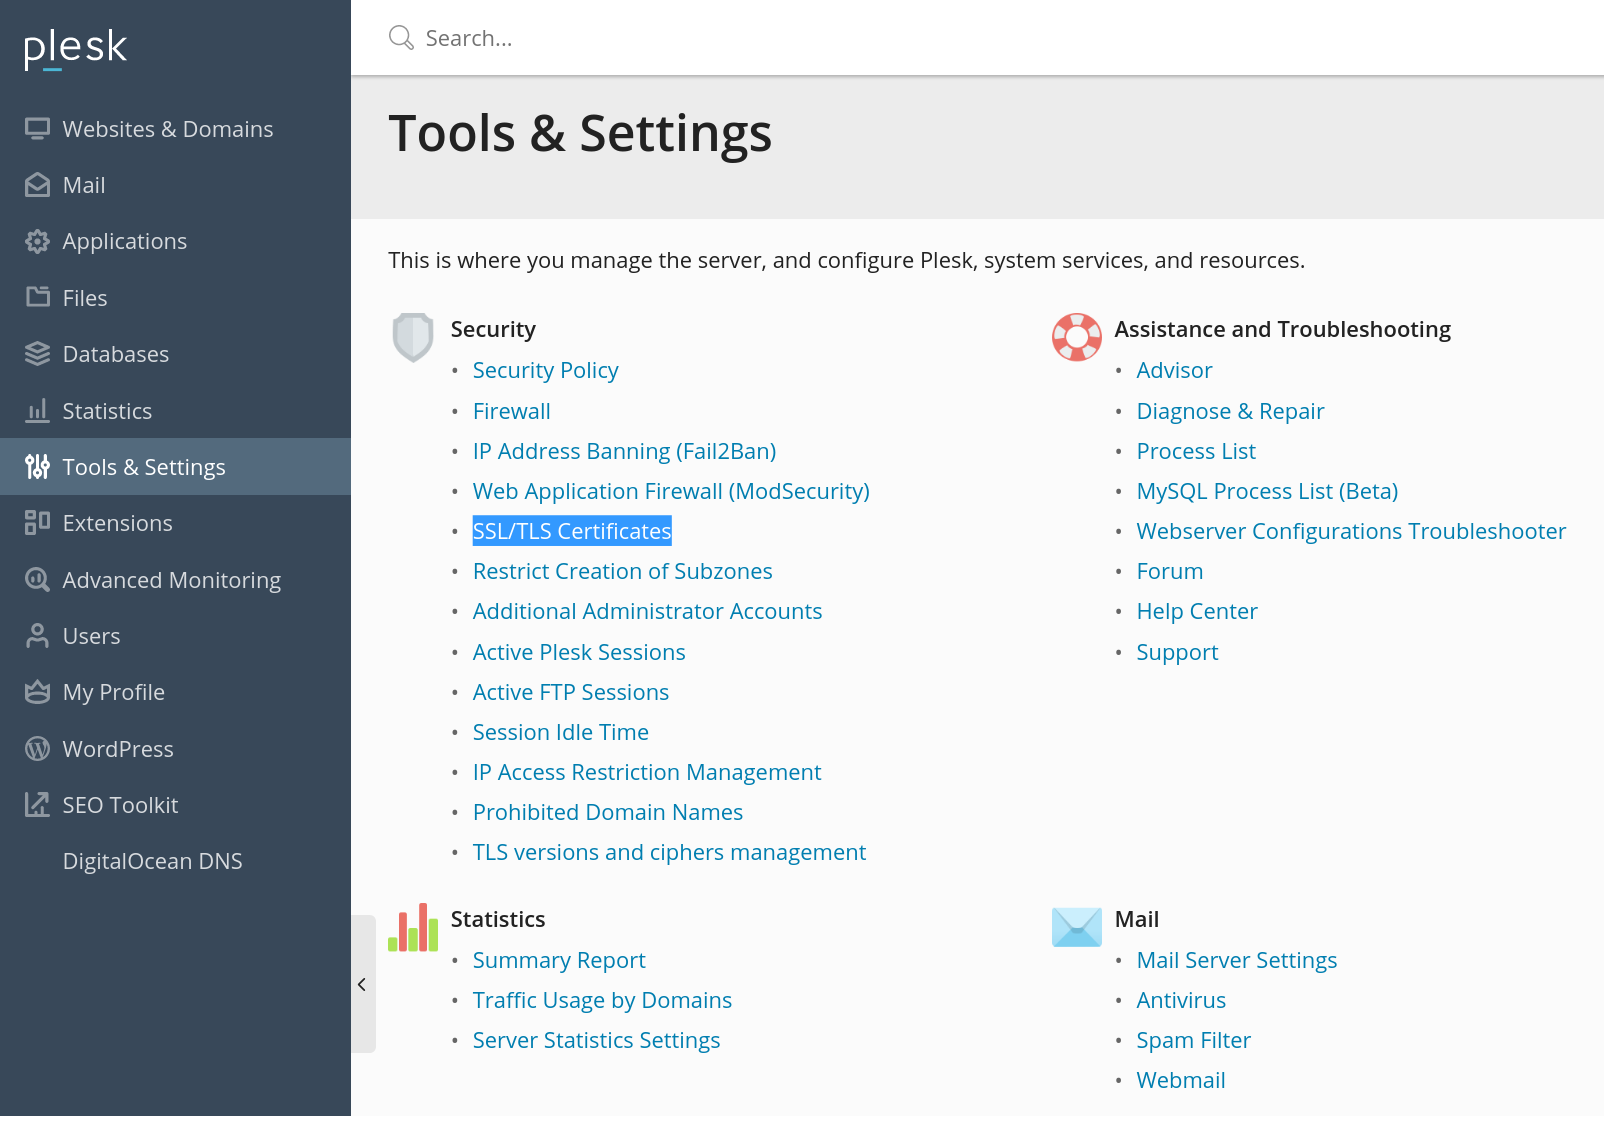
Plesk has a separate agenda for TLS certificates and their settings, which you will need. The shortest path to the certificate overview is via Tools & Settings in the side menu and the SSL/TLS Certificates link in the first Security section.
You will then see SSL/TLS Certificates agenda with an overview of the available TLS certificates and other options. At the bottom of this screen is an overview of the List of certificates in server pool that Plesk has available. Click Add to add another certificate.
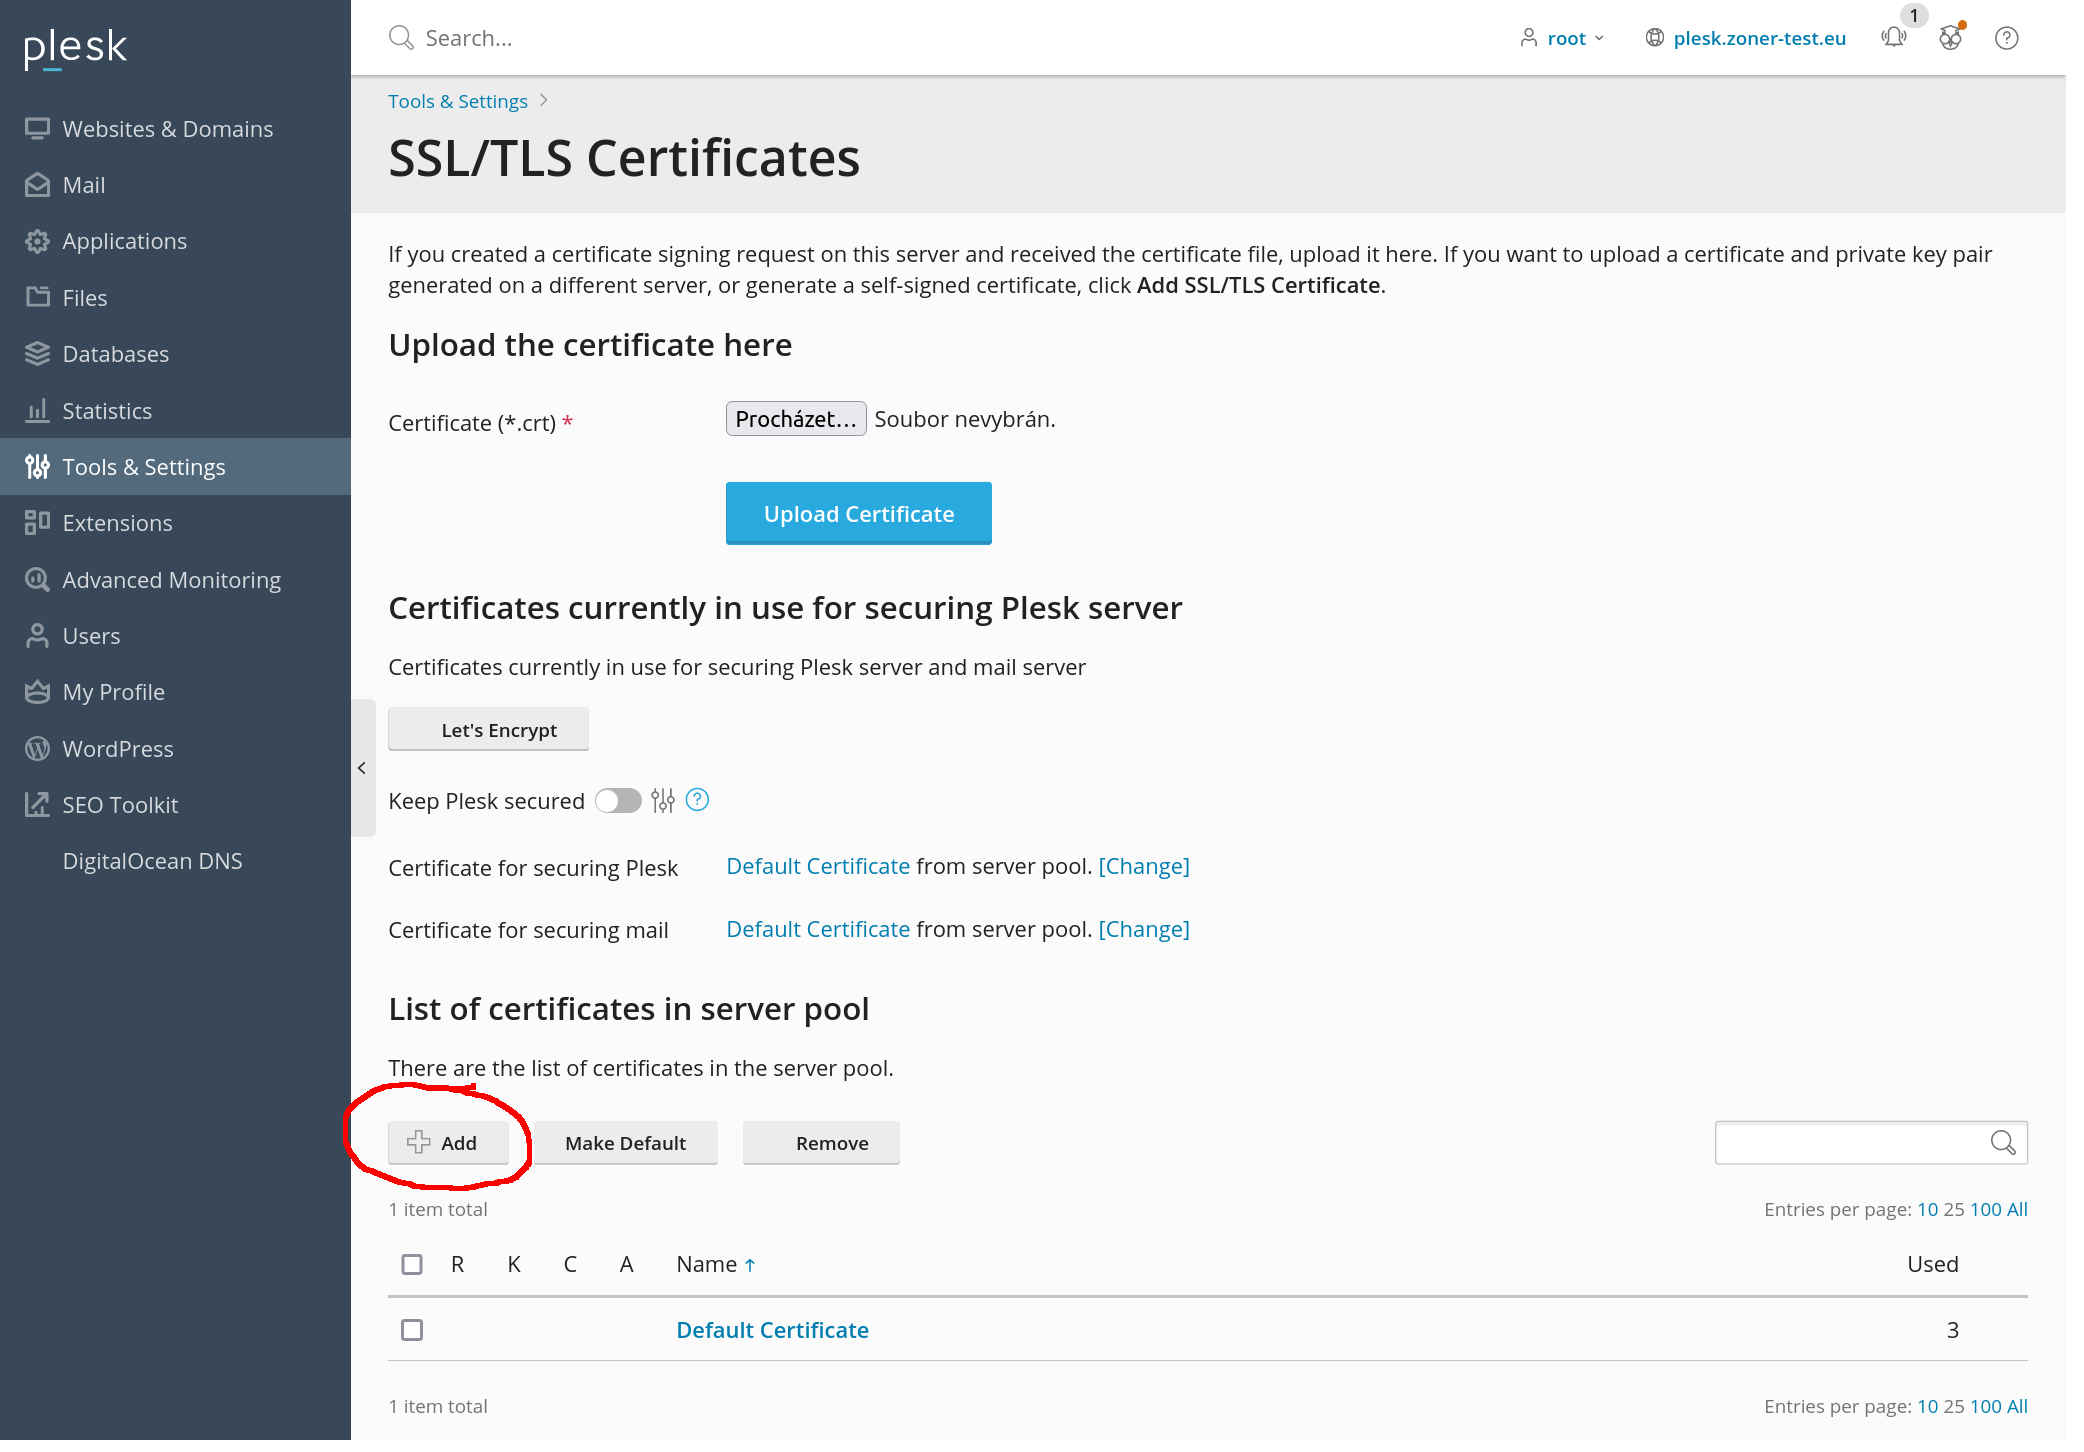
There are two options to insert a certificate on this page, so choose only one from the paragraph below.
Two options for importing the certificate to the server
You now have the two options that you see below; please choose one of them. However, we recommend the first option because it is significantly easier.
The first option is to upload the certificate files and the private key. Use this option if you have created a private key in our order and you have it available. This way you can insert the certificate in one step. Plesk offers you the option to select and upload keys as files, or insert them as text. It doesn't matter how you do it, you will receive certificates from us in text form (Base64) and you can also work with them in this way.
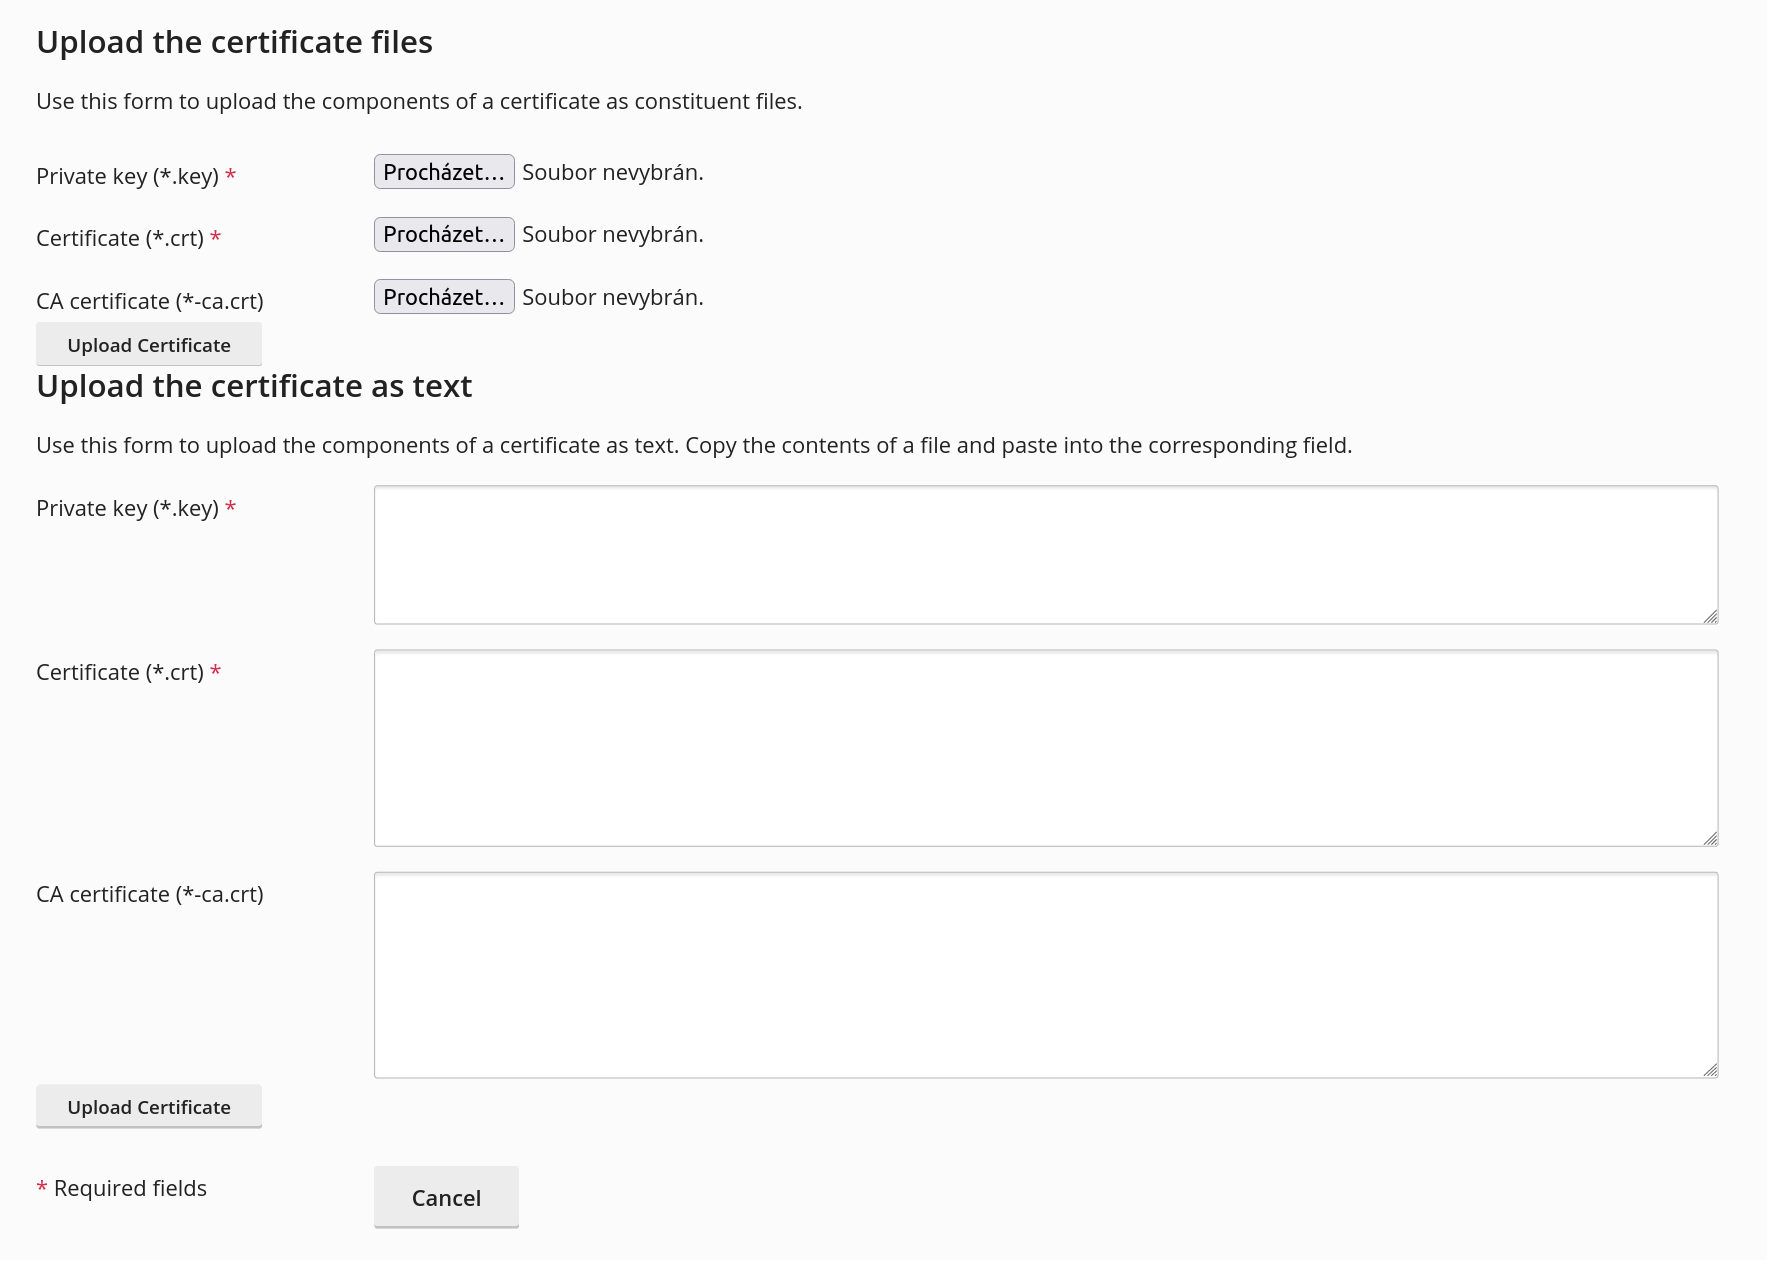
Therefore, if you have a certificate issued and you also have a private key for it, insert the files or texts into Plesk and confirm. This completes the insertion, and now you only need to set the certificate as the default and turn on redirection.
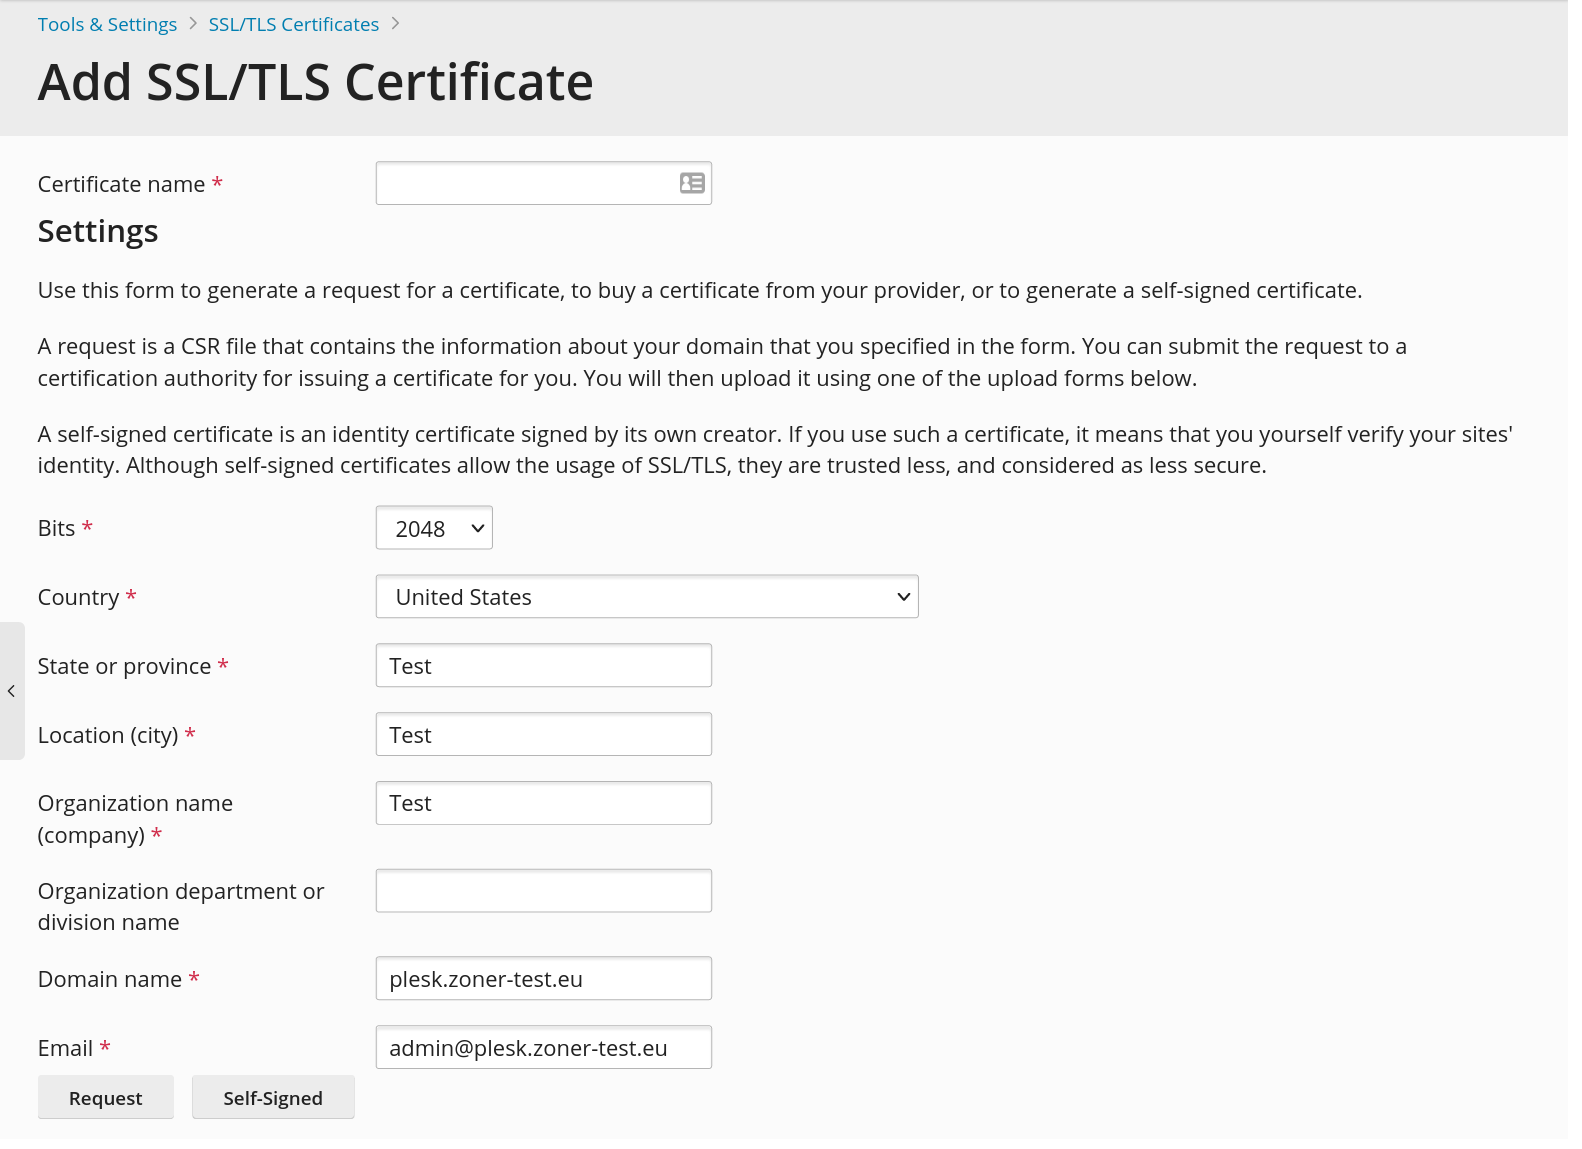
The second option is to create a certificate request, which is called CSR, and use it in our SSLmarket order. Fill in your certificate name (I recommend the domain and year of expiration) and all the data that Plesk wants from you. After filling in and clicking on the Request button, a CSR will be created.
However, Plesk will not show you the created CSR, but it will illogically take you back to the list of certificates. You have to click on the name of the certificate you have created and copy the CSR in its detail. You will then place this CSR in our order. You can see the CSR in the screenshot below.
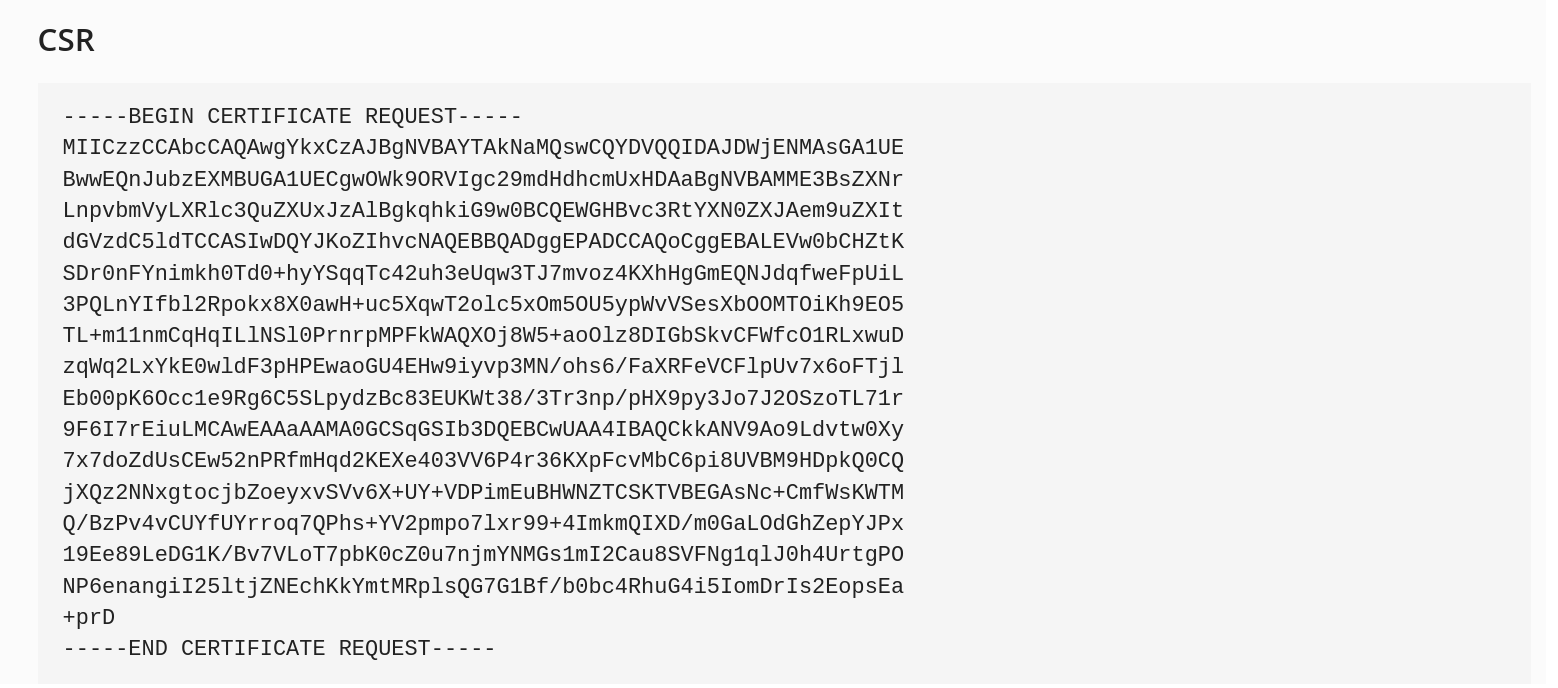
Copy this text and paste the CSR into our order, or send it to us by email. The private key must definitely not leave the server and definitely do not send it to anyone.
After the certificate is issued, insert it back into Plesk, where the corresponding private key you created earlier is waiting. This method is a two-step process and the certificate is usually inserted later than the request was created.
Completing the installation
You received a certificate for Plesk using one of the above methods, but that alone is not enough. Now you need to activate the issued certificate and set the redirection to HTTPS.
Go back to the certificate detail where you copied the CSR and find the Upload the certificate files section. Then, in the first option - Certificate (* .crt), upload the linux_cert + ca.pem file you received from us by email. In the second option - CA certificate (* -ca.crt), upload the Intermediate certificate, which you can download in our administration.
Now you need to activate the certificate, in order for it to appear on the website and start using the server. Once the certificate is inserted, go to Websites & Domains and click on the Hosting setting on the right (see screen).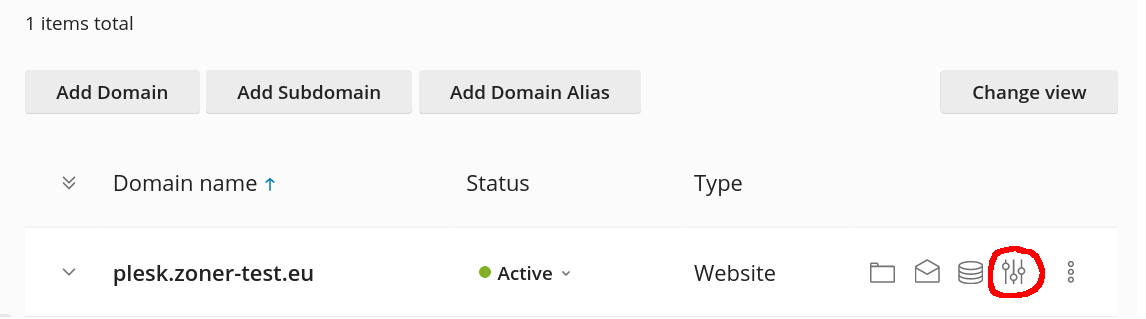
In the following dialogue, select the certificate you imported by name and confirm your choice. This activates a new certificate on the domain.
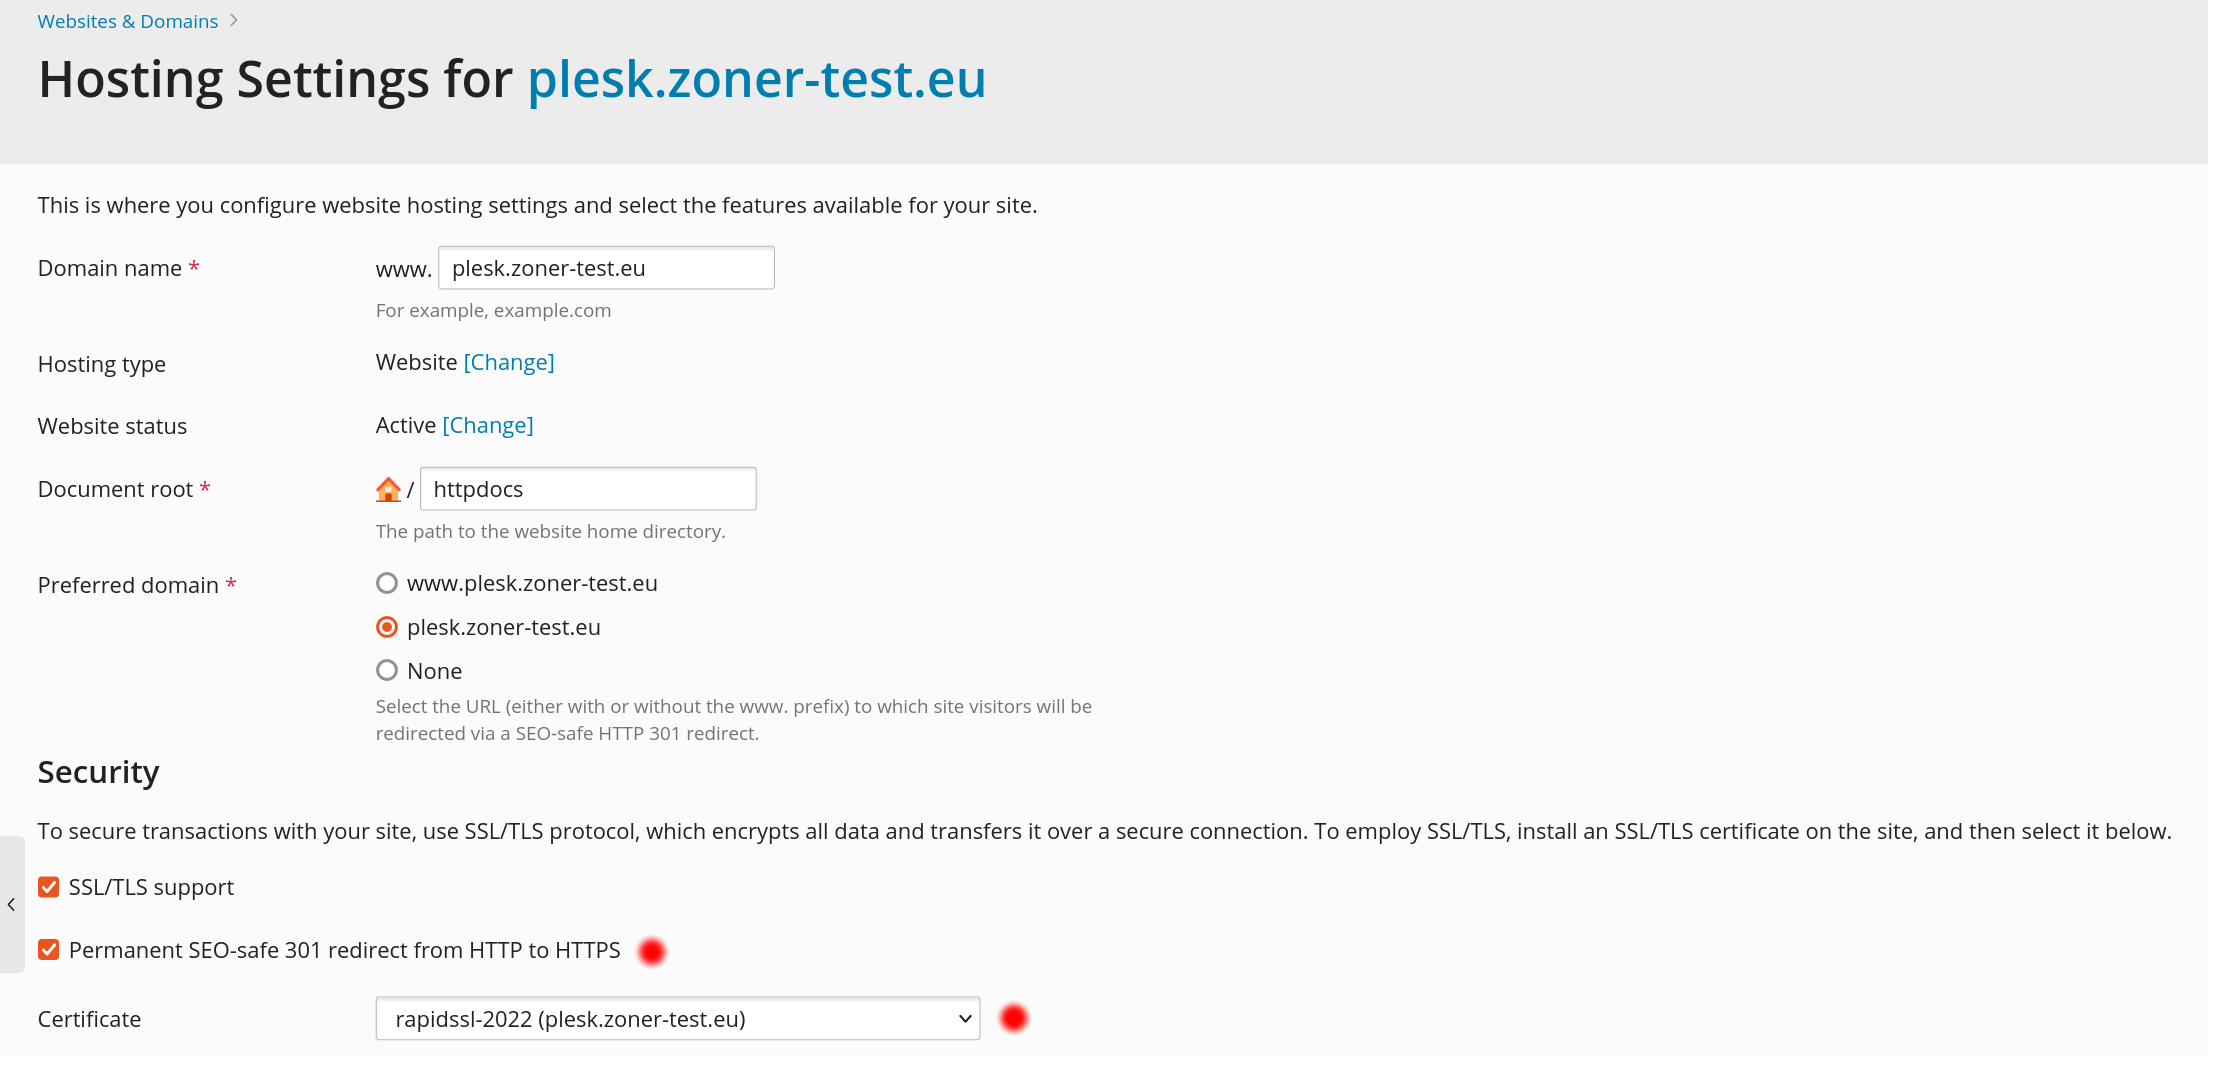
Also make sure that you have 301 redirect enabled to HTTPS there (just above that). That's all and the new certificate is already working on the website, and can be verified in our checker.
If you have any problems installing the TLS certificate on Plesk, contact the manufacturer's support or the administrator for the server Plesk is running on.

We are sorry that you did not find the required information here.
Please help us to improve this article. Write us what you have expected and not found out.